Okay, let’s be honest when December rolls around, I transform into a full-blown sparkle-and-glitter fiend. There’s something about fairy lights, peppermint mochas, and, yes, Christmas tree nail designs that just scream “holiday mood activated.” If you’ve ever sat there staring at your bare nails and thought, “I need festive flair stat,” this post is for you.
I’m about to walk you through 29 magical Christmas tree nail designs that you’ll want to immediately pin, screenshot, or (if you’re me) attempt right this minute. 😏 Whether you’re DIYing at home, hitting up your nail tech, or just browsing for inspo—I’ve got you.
Why Christmas Tree Nails Are the Ultimate Holiday Nail Trend
Before we dive into the designs, let me make my case: Christmas tree nails are adorable, versatile, and instantly festive. They let you channel yuletide vibes without going full-on gaudy (unless you want to—no judgment here).
- Symbolism: The Christmas tree is iconic—green, triangular, twinkle-y. It screams holiday spirit.
- Versatility: You can make it minimalist, glittery, 3D, jewel-toned—you pick.
- Conversation starter: “Oh, I didn’t plan to spill my hot cocoa on my nails… that’s just holly glitter.” 😉
Plus, when friends see your festive nails, they’ll ask, “Where’d you get those?!”—and you’ll suddenly become The Nail Trendsetter.
Things to Think Through Before Nail-Tree-ing
Just like planning your tree before draping lights, consider these things before jumping into nail art.
Nail Shape & Length
Short, medium, long, stiletto, coffin, squoval—your canvas changes.
- Short nails: Go for simplified outlines or minimalist tree silhouettes.
- Medium/long nails: More space means room for ornaments, garlands, even tiny presents.
Base Colors & Backgrounds
Your base color sets the vibe:
- Classic white, deep green, black, or nude
- Gradient “sky to snow” looks
- Sparkly or sheer backgrounds
Accents & Decoration Styles
How extra do you want to go? Choices include:
- Flat painted details
- Glitter, foil, metallic accents
- Rhinestones, microbeads, studs
- 3D elements like tiny bows or pom-poms
Tools & Materials
If you’re DIYing, you’ll want:
- Thin nail art brushes or striping brushes
- Dotting tools
- A good top coat (gel or regular)
- Rhinestones, glitter powders, foil sheets, etc.
Okay, enough prep talk. Let’s get to the fun part.
29 Christmas Tree Nail Designs You’ll Actually Want
Here’s your inspo cache. I’ve grouped them loosely by style so you can jump to what fits your mood.
1. Minimalist Line-Tree on Nude

On a nude base, use a single thin white or gold line to outline a stylized tree. Add one dot at top for a star. Simple, chic, and wearable anywhere.
2. Classic Green Tree with Ornaments

Paint a classic triangular green tree and dot tiny red, gold, silver “ornaments.” Finish with a brown trunk. Works well on medium-length nails.
3. Glitter Gradient Tree
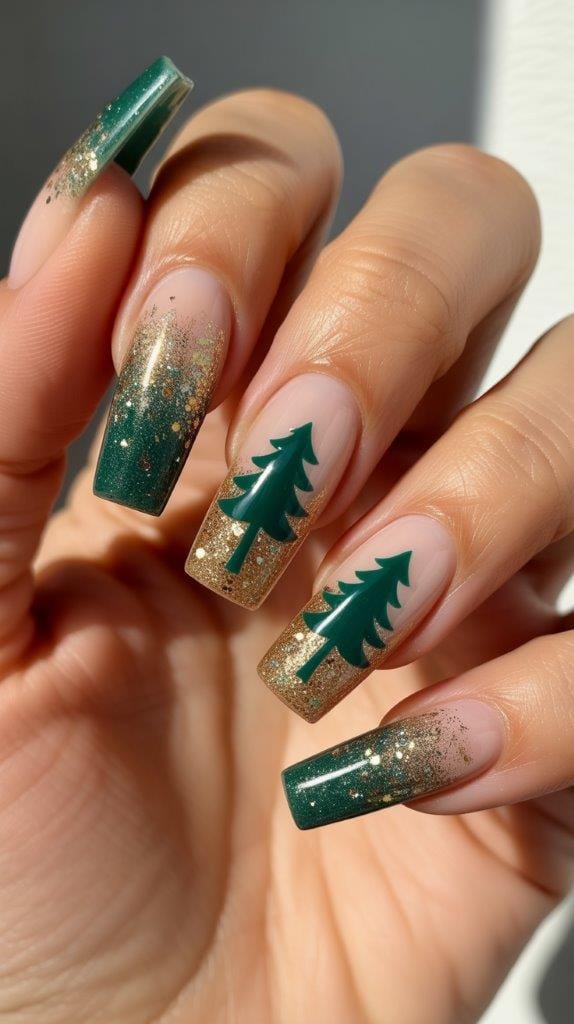
Do a glitter fade (densest at the nail tip) using green or gold. Then overlay a dark tree silhouette. Sparkly but not over the top.
4. Foil Accent Trees
Use metallic foil (silver, gold, holographic) to create tree shapes. The foil catches light beautifully. Top it with a clear coat so it lasts.
5. White Tree on Deep Color


On a dark base (navy, burgundy, black), paint a white Christmas tree outline. It pops in a dramatic, classy way.
6. Negative Space Tree

Leave parts of your nail bare to form the tree shape. Surrounding color or glitter frames it. Super trendy vibe imo.
7. Ombre Tree with Sky Background

Make a gradient background (say blue at cuticle, then white toward tip) and paint a black or dark green tree silhouette over it. Feels like “tree under a winter sky.”
8. Rustic Woodland Tree


Use a mossy green base and matte finish. Tree silhouettes can be thinner/branchy. Add tiny woodland details like deer or stars.
9. Garland & Lights Wrapping Tree

Add a zig-zag garland line across your tree, then dot multi-colored tiny “lights.” Use thin neon paint or fine glitter lines.
10. Rhinestone-Encrusted Tree

Make the tree with rhinestones or crystals only (no painted lines). It screams “I’m extra”—in the best way.
11. 3D Pom-Pom Tree

Attach super tiny pom-pom balls as ornaments. For the topper, maybe a tiny star stud. Cute, playful, slightly whimsical.
12. Candy Cane Tree

Paint stripes of red and white in a tree shape, or add candy-cane patterns inside your tree. Sweet and festive (yes, pun intended).
13. Glitter Drip Tree

Have your tree “drip” with glitter, like branches melting into sparkles toward the nail tip. Artsy and modern.
14. Black & Gold Lux Tree

Black base, tree in gold with fine lines and metallic accents. Very glam—think “holiday gala” nails.
15. Watercolor Tree

Use watered-down nail polishes or special nail watercolors. The tree edges (and branches) look fuzzy and soft, artistic-feel.
16. Snowy Tree

Paint white snow on branches or falling around the tree. Add snowflakes near tips. Perfect for “I want winter, not just Christmas.”
17. Multi-Tree Pattern


Instead of one big tree, paint mini trees in a repeating pattern across each nail. Fun especially on squoval or square nails.
18. Tree + Text Combo

On one or two accent nails, paint “Merry” or “Joy” next to or under a small tree. Use calligraphy or block lettering styles.
19. Tree in a Wreath

Paint a circular wreath frame, then nestle a little tree inside. Add red dots (berries) around it. Cute for accent nails.
20. Metallic Outline Tree

Use a metallic gel pen (gold or silver) to outline your tree, then leave the inside semi-transparent or filled with delicate designs.
21. Galaxy Christmas Tree

Make a galaxy background (deep blues, purples) with shimmer. Then silhouette a black or dark green tree in front. Cosmic holiday vibes.
22. Abstract Tree

Use triangles, slashes, geometrics to hint “tree” without being literal. Trendy and artsy—leaves room for interpretation.
23. Accent-Nail Only Trees


Just one or two nails have the Christmas tree; the rest are solid shades (e.g. deep green or red). Balanced and wearable.
24. Tree + Candy or Gingerbread

Mix motifs: tree on one finger, gingerbread or candy on another. Great if you want overall holiday nails, not just trees.
25. Pastel Tree

Don’t limit yourself to green. Try mint, blush, even lavender. Pastel Christmas tree nails = unexpected and soft.
26. Gradient Trees

Use multiple shades of green horizontally or vertically to shade the tree itself. Gives depth and dimension.
27. Matte Tree, Glossy Base

Make your base glossy, then the tree shape in a matte top coat (or vice versa). Subtle texture play.
28. Snow Globe Tree

Frame a tree inside a “sphere” outline (draw bubble shape). Add little dots like snow inside. Whimsical and storybook-y.
29. Mixed Media Tree

Combine paint, glitter, foil, rhinestones, maybe even tiny chains or charms. It’s your holiday. Go wild (within reason).
Which Designs Suit Which Occasions?
Let me help you pick depending on where you’ll rock your festive nails:
| Occasion | Best Style | Why |
|---|---|---|
| Office or low-key holiday dinner | Minimalist line-tree, negative space | Elegant but still festive |
| Holiday party / night out | Rhinestone tree, metallic outline | Glam and eye-catching |
| Winter wedding or formal event | White tree on deep color, matte/gloss contrast | Classy yet festive |
| Casual & fun days | Pom-pom tree, candy cane tree | Playful and lighthearted |
| Nail art challenge or show-off session | Mixed media, galaxy tree | Bolder, more complex designs |
Step-by-Step How to Nail (ha) Your Christmas Tree Design
Here’s a simplified process I often use when DIYing (and sometimes when I pretend I’m a pro):
- Prep your nails (shape, buff, base coat).
- Apply your base color or gradient background—let it fully cure/dry.
- Outline your tree shape (triangle or branches) with a fine brush or pen.
- Fill or shade in the tree. Use your desired technique (solid fill, ombre, glitter, etc.).
- Add accent details: ornaments, lights, snow, foil, rhinestones.
- Seal with a generous top coat, especially if you used 3D or glitter elements.
- Clean edges with a small brush dipped in remover or alcohol (for gel systems).
Tips from my experience:
- Work in layers, especially with glitter or foil.
- Use thin coats—less is more (avoids bubbling or thick messes).
- If placing rhinestones or heavier pieces, apply a bit of gel or glue first and cure.
- Don’t rush curing/drying. Wet glitter or foil gets messy if disturbed.
DIY vs Salon: Which Route Should You Go?
Let’s talk pros & cons—because sometimes I like to be lazy and leave it to the professionals.
DIY at Home
Pros:
- More control, more creativity
- Cost-effective (after initial supplies)
- You can redo as much as you like
Cons:
- Time-consuming
- Mistakes will happen (I’ve been there)
- Some materials (fine brushes, gels, curing lamps) might be an upfront cost
Salon / Nail Tech
Pros:
- Expert skill, polished result
- Durability (gel systems, better adhesive for 3D)
- You don’t have to clean up afterward (bonus)
Cons:
- More expensive
- You have to communicate exactly what you want (miscommunication risk)
- You may not get every fine custom detail
If I were you, I’d DIY simpler designs and reserve the more intricate, rhinestone-heavy ones for a pro.
How to Pick the Right Theme for You
It’s not one-size-fits-all. Ask yourself:
- How bold do I want to go? Subtle elegance or sparkle explosion?
- What’s my daily life like? If you’re on computers a lot, super-long nails might snag stuff.
- What’s my wardrobe palette? If your wardrobe runs neutrals, maybe a white tree on black base is fire.
- How much time/energy do I have? Some designs demand patience.
Also: take inspiration, not imitation. Mix & match ideas from different designs above to make something you adore.
Common Mistakes (and How to Avoid Them)
Since I’ve messed up more nails than I care to admit, here are some pitfalls:
- Too-thick coats → bubbling or slow drying
- Overcrowding with elements → things fall off or design looks messy
- Skipping base/top coats → chipping and peeling
- Not letting layers cure fully → everything shifts
- Poor tool choice → blunt brushes, big dots, messy lines
The remedy? Patience. Thin layers. Quality top coat. And testing on a practice nail if you can.
Final Thoughts & Your Next Move
So there you have it: 29 festive, fun, fabulous Christmas tree nail designs that range from the barely-there to “did you photocopy a glitter storm?” level.
If I had to pick my favorites right now? I lean toward the negative space tree, rhinestone-encrusted tree, and tree with garland & lights. Each time I try one, I giggle at how I look like a sparkly evergreen.
Here’s your actionable little game plan:
- Choose one or two styles from above.
- Do a mock sketch or test on a fake nail or plastic tip.
- Gather your materials (or call your favorite nail tech).
- Set aside me-time (it’s holiday self-care too).
- Share your results—tag me, drop me a pic, let me gaze at your glittery trees.
May your nails sparkle brighter than tinsel and hold up better than my willpower around Christmas cookies. 🎄✨
Happy tree-nailing — you gorgeous holiday queen!
Leave a Reply
You must be logged in to post a comment.