

December salon bookings fill up weeks in advance. Between office parties, holiday errands, and family dinners, few people have two hours and eighty dollars to spend on a professional manicure. You do not need formal beauty school training or surgical precision to paint festive nails at home. With a toothpick, a makeup sponge, and regular drugstore polish, you can turn your coffee table into a working nail station.
If you want holiday nails without spending your entire Saturday afternoon in a salon chair, try these 13 quick DIY Christmas nail art designs. Each look takes under fifteen minutes, uses simple household items, and gives you crisp, tidy results right away.
1. Minimalist Candy Cane French Tips
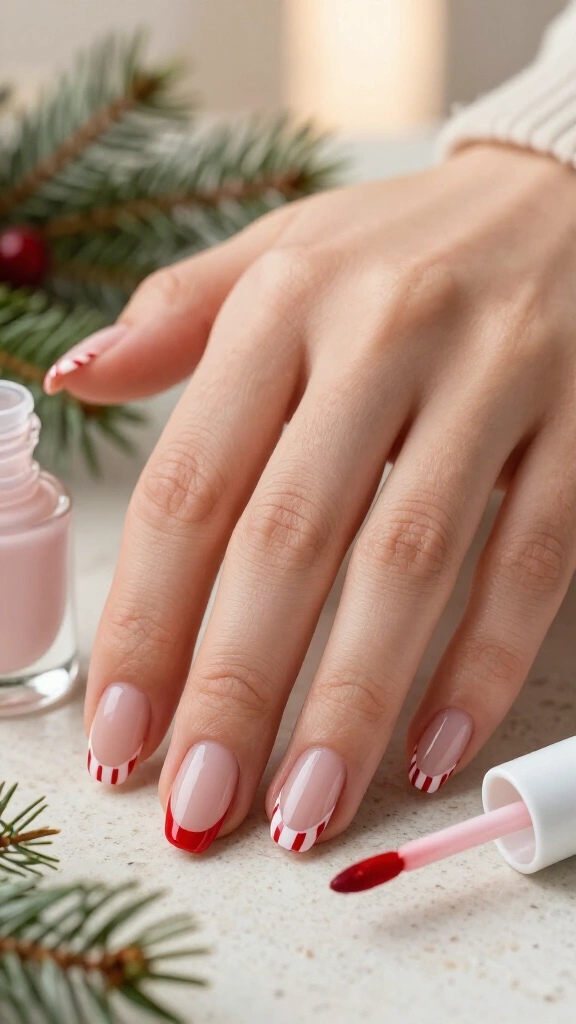
Skip the fussy nail vinyls and hand-painted miniature Santas. This clean variation on the classic French tip uses thin diagonal red and white stripes across the tips. You keep a simple, bare-nail base while adding a holiday touch that fits both office meetings and casual family gatherings.
How to Nail the Look
- Swipe a sheer milky pink or nude base over clean, dry nails.
- Dip an ultra-thin striping brush into red polish and paint three diagonal lines across the edge of each nail.
- Paint matching lines with an opaque white polish directly beside the red stripes.
Seal your work with a clear, chip-resistant top coat. If you prefer low-maintenance styles, check out our favorite simple Christmas nails for more subtle options. The angled lines give short nails a longer, leaner appearance in under ten minutes.
2. Glitter Ombré Snowfall Accent Nails
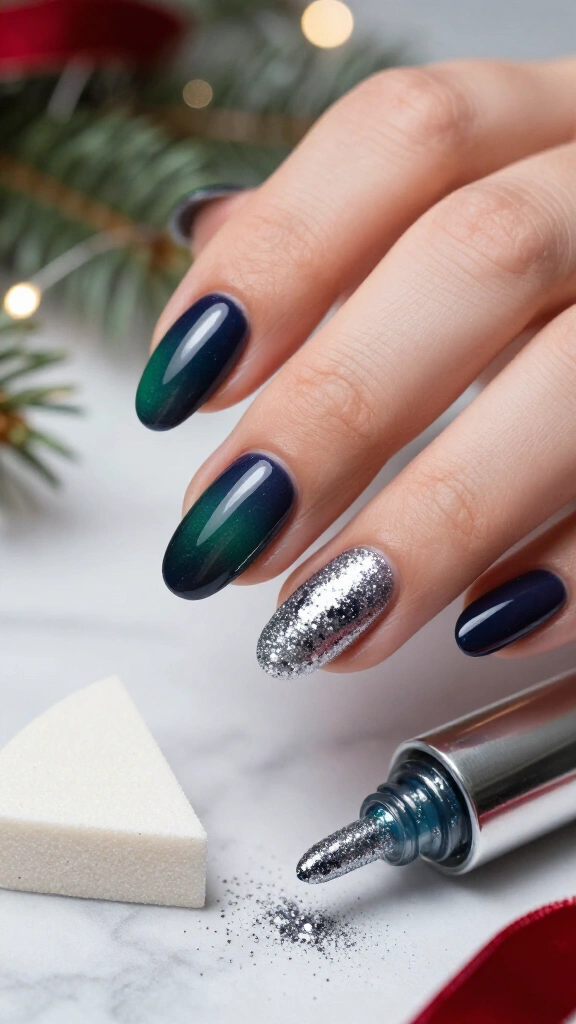
A sponge creates an even glitter gradient far faster than a standard nail brush. Instead of coating every finger in thick sparkle polish that takes ages to scrub off later, concentrate the glitter on your ring fingers. The fade pattern mimics falling snow over a dark sky.
Apply two coats of navy, forest green, or dark plum polish. While the second coat stays slightly tacky, paint dense silver glitter directly onto the edge of a clean makeup sponge. Dab the sponge lightly near the cuticle line and fade it down toward the middle of the nail. The sponge absorbs excess clear base liquid and deposits pure glitter flakes exactly where you tap it.
Add a thick layer of quick-dry top coat to smooth down the rough sparkle texture. Beauty writers at Byrdie note that applying glitter with a cosmetic sponge prevents thick, gloopy layers that take forever to dry.
3. Dotter-Tool Holly Berry Clusters
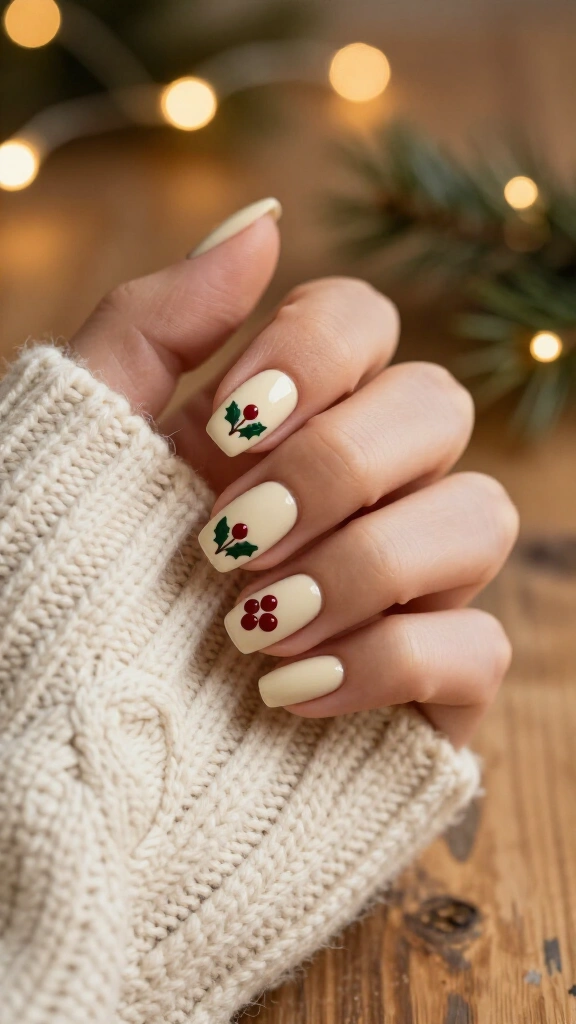
A standard bobby pin or an empty mechanical pencil works just as well as a salon dotting tool. This pattern relies entirely on round dots, so you never have to sketch delicate shapes freehand. It offers a vintage holiday feel without looking messy.
Paint your nails with an opaque cream or sheer beige polish. Dip the round tip of a bobby pin into deep red lacquer and press three small dots together near your cuticle. Next, dip the point of a wooden toothpick into dark green polish and drag two tiny leaf marks outward from the berries. Each accent nail takes about one minute to finish.
4. Velvet Emerald Cat-Eye Magic
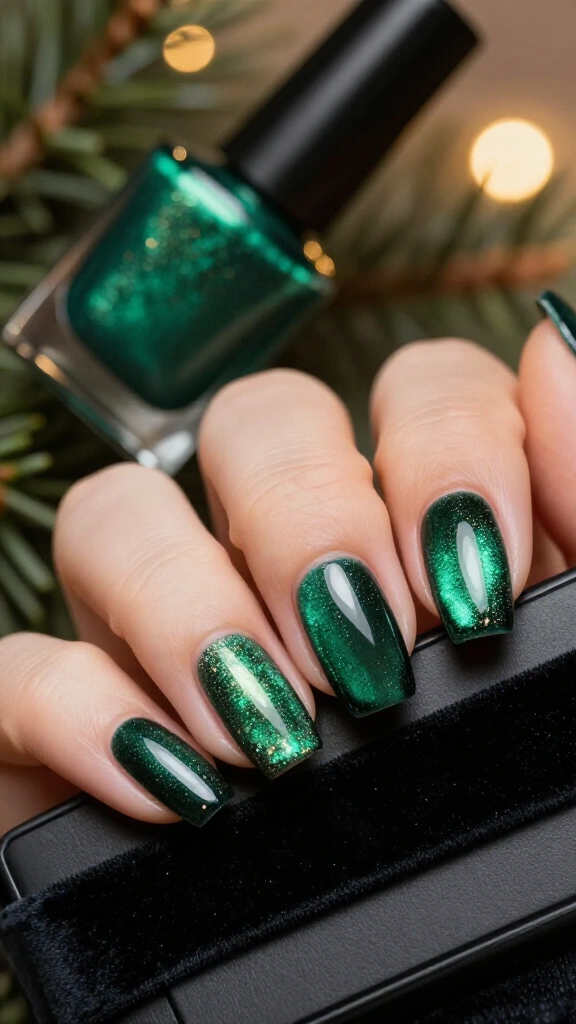
Magnetic cat-eye polish offers the easiest shortcut to dimensional nails. These formulas contain tiny iron particles that react when you hold a small magnet over the wet surface. The magnetic pull creates a rich, textured depth that resembles real velvet ribbon.
Apply a coat of emerald green cat-eye gel over a dark base coat. Hold your wand magnet at a 45-degree angle over the wet nail for ten seconds before curing. The metallic flakes pull toward the magnet, producing a plush shimmer across the center of your nail. Finish with a glossy top coat to catch the light from every angle.
5. Golden Ribbon Striping-Tape Trees
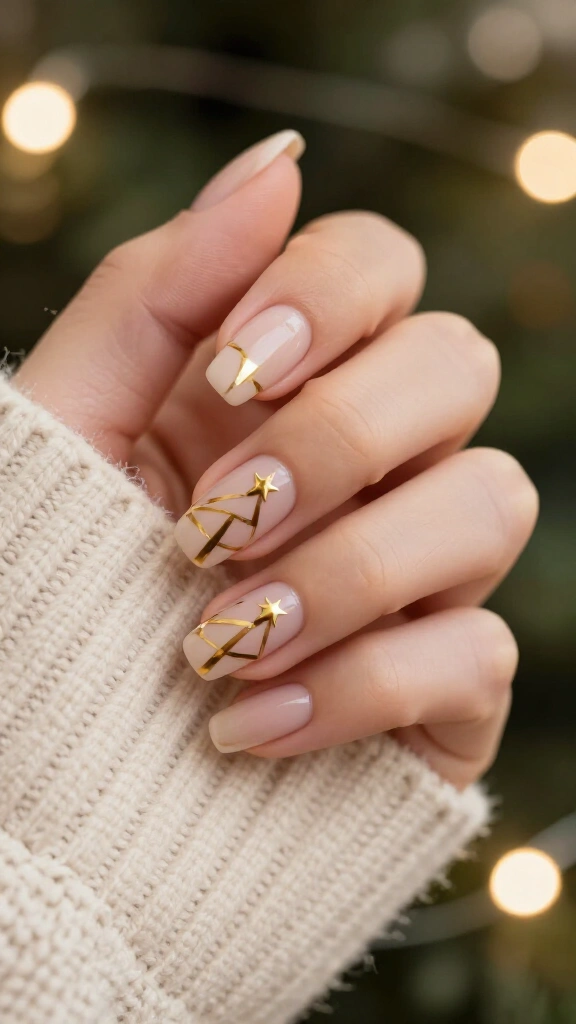
Striping tape helps you paint sharp geometric shapes without relying on a steady hand. If freehand brushwork makes you nervous, adhesive tape solves the problem instantly. This design turns simple tape lines into a clean, modern Christmas tree shape.
Paint your nails with a neutral beige or soft pink and let it dry completely. Cut two short pieces of metallic gold striping tape and press them down in an inverted “V” shape that meets near the tip of your nail. Stick a small gold star stud or dot a touch of gold polish at the top point. Browse our collection of gold Christmas nails for more ways to wear metallic accents. Striping tape stays flat, skips drying delays, and produces sharp lines every time.
6. Frosted Peppermint Swirls
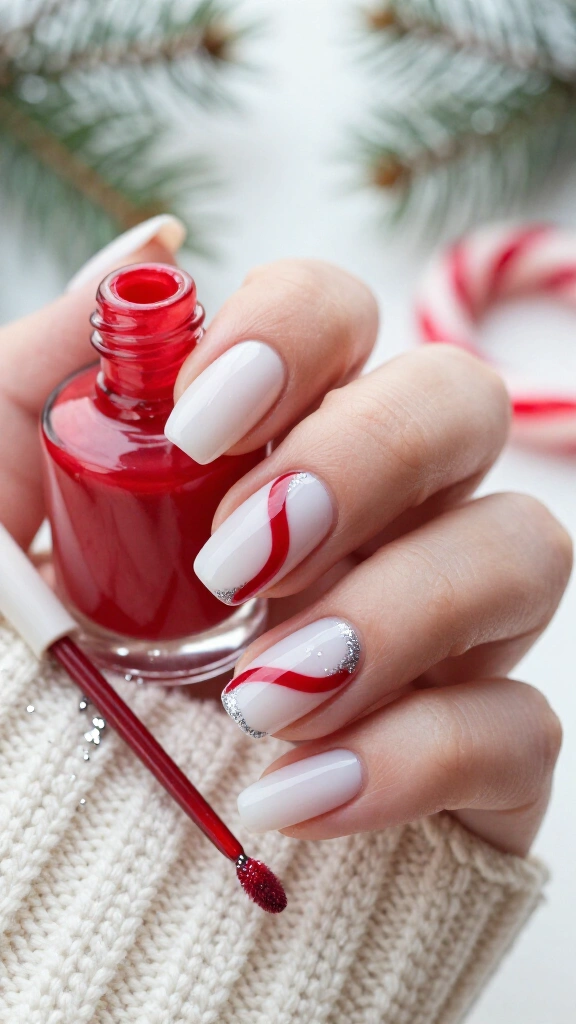
Capture the look of vintage holiday candies with curved peppermint ribbons. Painting full peppermint disks takes practice, but pulling a single curved line across an accent nail takes just two brush strokes. You get festive stripes without the stress of perfect symmetry.
Apply a soft white base coat across your nails. Dip a long striper brush into deep red polish and paint a gentle S-curve from the upper corner down toward the opposite cuticle. Trace the edge of the red line with silver glitter polish. The glitter border masks any slight hand tremors in your red stroke and adds extra shine. Apply a plumping top coat to seal the edges flat against the nail.
7. Negative Space Starbursts
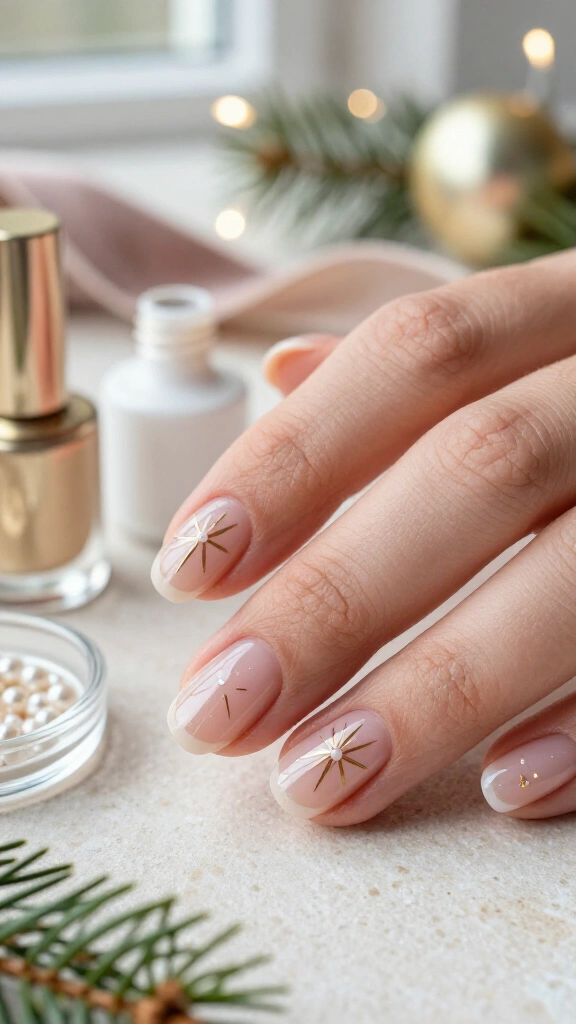
Negative-space manicures keep large areas of the natural nail visible. This cut-out style cuts down your painting time and hides regrowth lines as your nails grow out over the holidays. The design holds up well from Christmas through New Year’s celebrations.
Start with a clear protective base coat. Dip a fine detail brush into gold or bright white polish. Paint a tiny plus sign, then cross it with two shorter diagonal strokes to build an eight-point star in the center of your nail. Place a small rhinestone in the middle using a drop of nail glue. The result looks tidy, intentional, and crisp.
8. Dainty Pearl & Rhinestone Ornaments
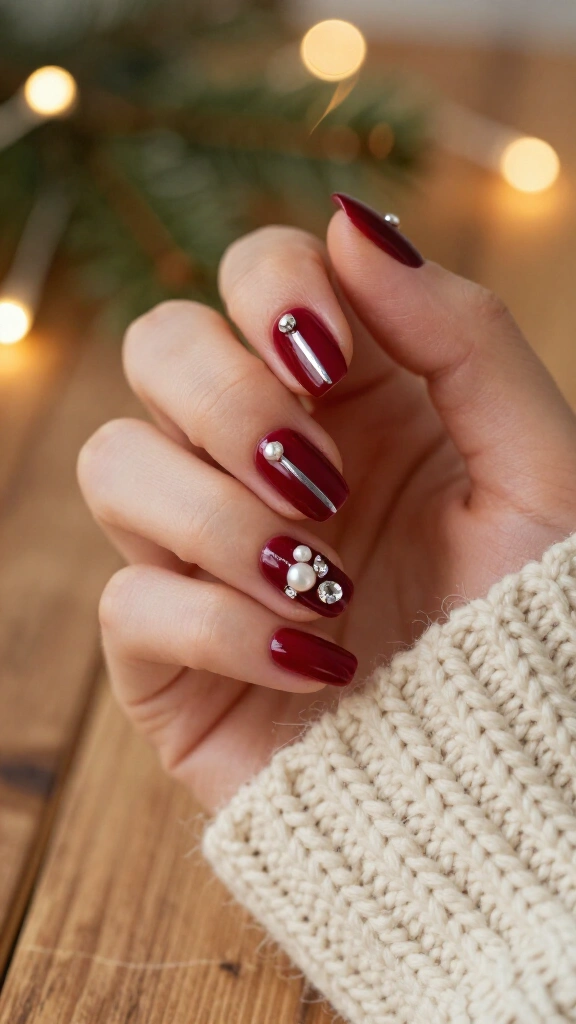
Small gems save you from spending twenty minutes painting detailed ornaments by hand. Flat-backed craft pearls and clear crystals turn flat polish into small jewelry accents. You can finish both hands in ten minutes while watching a holiday movie.
Step-by-Step Application
- Apply two coats of deep berry or wine polish and let it dry for five minutes.
- Draw a single straight vertical line down the nail using a fine striper brush dipped in silver polish to represent the ornament string.
- Place a tiny dot of nail glue at the bottom end of your silver line.
- Pick up a flat-backed pearl or colored crystal with a wax pencil and press it onto the glue.
Raised gems give the manicure tactile texture. To keep your stones from catching on knit sweaters, read our complete guide on how to do a salon-quality manicure at home.
9. Plaid Flannel Stamping Accent
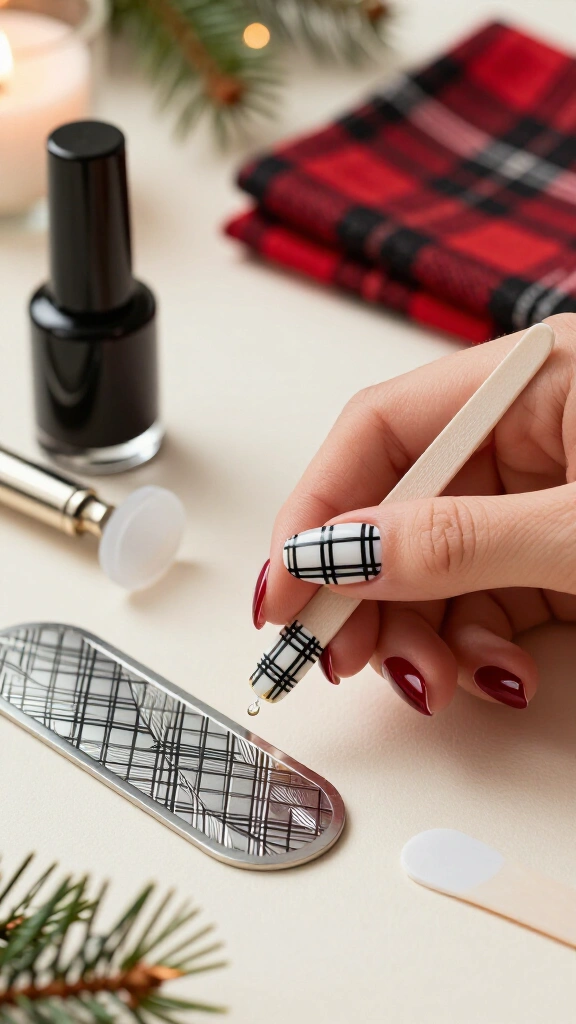
Tartan patterns fit December weather perfectly, but drawing straight intersecting lines by hand takes immense patience. Metal stamping plates transfer crisp plaid patterns onto your nails in seconds, making complex line work painless.
Paint your nails with an opaque white or deep red polish. Spread black stamping polish over your chosen tartan plate, scrape the card across at a 45-degree angle to clear the surface, and press your silicone stamper straight down into the etched metal. Roll the stamper across your accent nail in one smooth movement. Stamping plates from brands like Maniology produce clean flannel lines that mimic woven fabric.
10. Glossy Cherry Red with Silver Foil Flecks
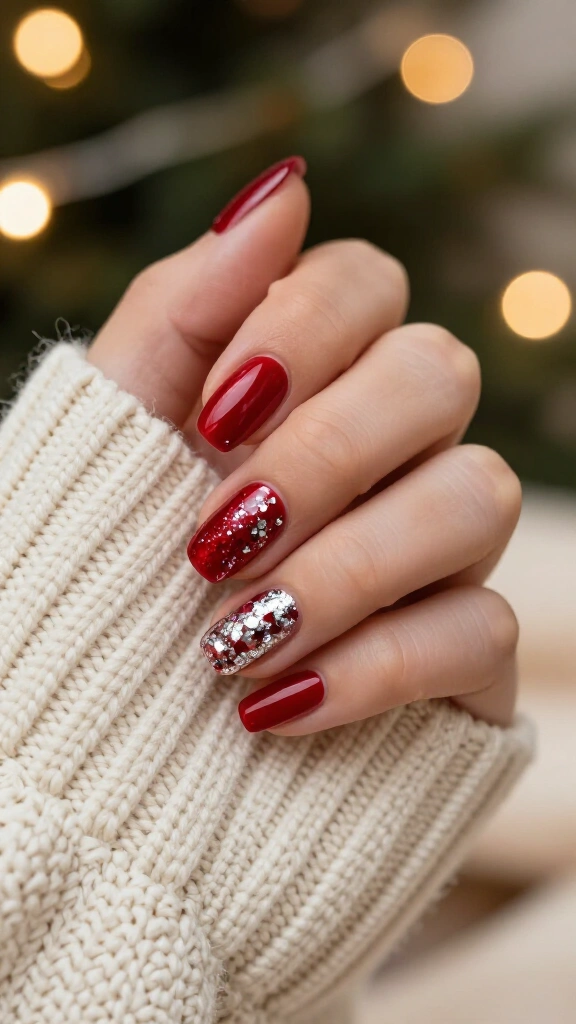
Nail transfer foils add metallic shine without demanding any brush precision. The irregular foil flakes catch the light like tinsel or crumpled foil wrap. Because you place the pieces randomly, you never have to worry about matching both hands.
Paint your nails with two coats of classic crimson red. While the second coat stays slightly sticky, pick up tiny bits of silver transfer foil with tweezers and drop them onto the nail. Pat the flakes smooth with your finger or a silicone cuticle tool. Seal the surface with two coats of clear gloss to trap the foil under a smooth finish.
11. Champagne Chrome Glazed Tips
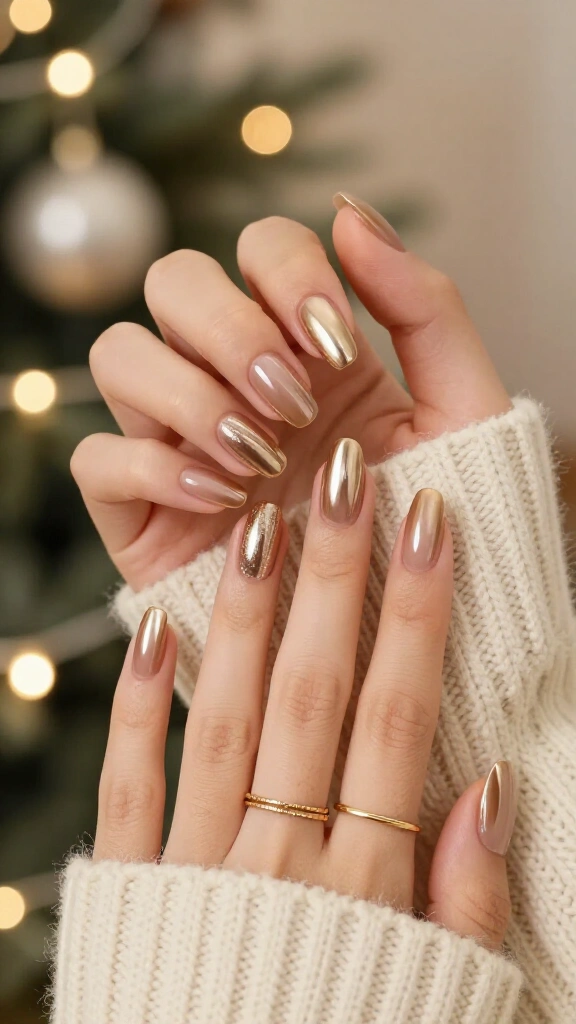
The glazed chrome manicure remains widely popular for good reason. Swapping out bright white chrome for a warmer champagne tint provides a softer metallic shine that pairs well with gold holiday jewelry. It delivers a mirrored sheen in very little time.
Paint your nails in a sheer caramel or nude polish, followed by a no-wipe gel top coat. Cure the top coat under your lamp for thirty seconds, then rub champagne chrome powder across the nail using an eyeshadow sponge. The fine powder turns the base coat into a reflective metallic sheen instantly. Dust off excess powder near your cuticles with a dry brush before sealing the chrome with a final top coat.
12. Snowflake Stickers Under Gel Top Coat
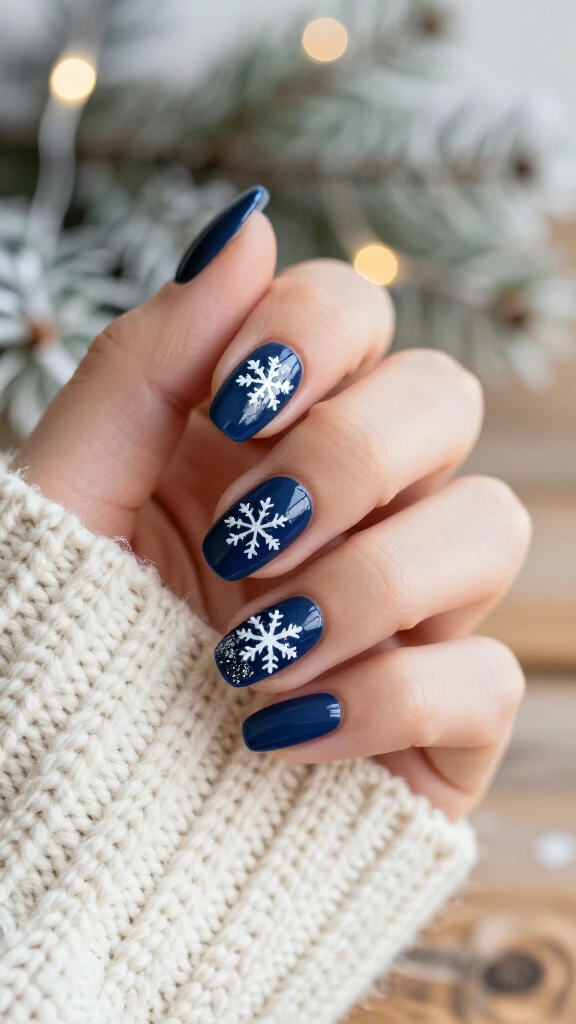
Modern nail stickers sit flat on the nail plate and disappear cleanly under a thick top layer. They offer a quick shortcut when you lack the time to paint snowflakes line by line.
Choose your base color: baby blue, pale blush, and dark navy all work well for winter backgrounds. Let the polish dry completely before handling the stickers so you do not dent your base coat. Lift a white or silver snowflake decal with fine tweezers and press it onto the center of your nail. Cover the sticker with a thick gel-effect top coat to seal down every edge completely.
13. Abstract Pine Tree Swipes
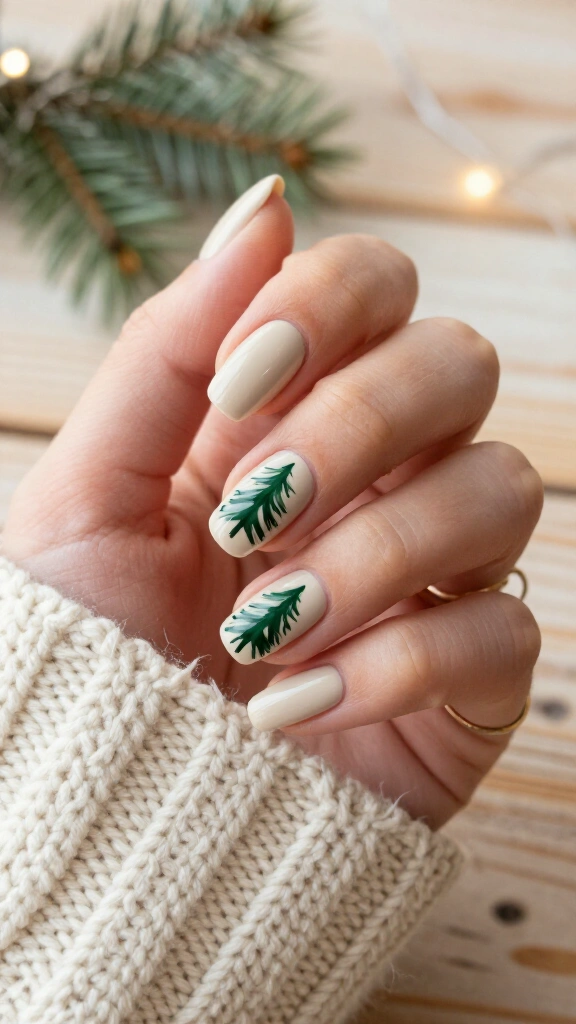
Abstract brush marks give nails an artistic feel without demanding strict realism. Instead of painting dozens of individual needles, use the flat bristles of your regular nail polish brush to build a pine tree in three swift strokes.
Paint your nails with an opaque cream or pale beige background. Wipe almost all the polish from your forest green brush until the bristles look dry. Flick the brush sideways against the nail in three descending marks: a short flick at the top, a medium stroke in the middle, and a wider sweep at the bottom. The dry bristles create a natural evergreen branch texture. Finish with a gold dot at the top point to anchor your tree design.
Quick Tips to Make Your DIY Holiday Nails Last Through New Year’s
Even the neatest DIY manicure disappoints if the edges lift after two days. Follow these practical prep steps to keep your holiday designs intact throughout the week:
- Dehydrate the nail beds: Wipe your bare nails with isopropyl alcohol or pure acetone before painting to remove surface oils that prevent polish from sticking.
- Cap the free edge: Sweep your brush horizontally across the tip of each nail on every single coat to seal the edge against chipping.
- Hydrate your cuticles: Dry winter air weakens polish quickly. Manicurists at Allure suggest rubbing jojoba oil into cuticles daily to keep nails flexible and prevent polish cracks.
Wrapping It Up
Holiday nails do not require expensive salon visits or hours of stressful freehand drawing. Simple household tools, such as bobby pins, cosmetic sponges, and peel-and-stick decals, help you create tidy holiday manicures in minutes. Pick your favorite design from this list, put on a holiday movie, and paint a fresh set of nails for your next winter gathering.
Leave a Reply
You must be logged in to post a comment.