
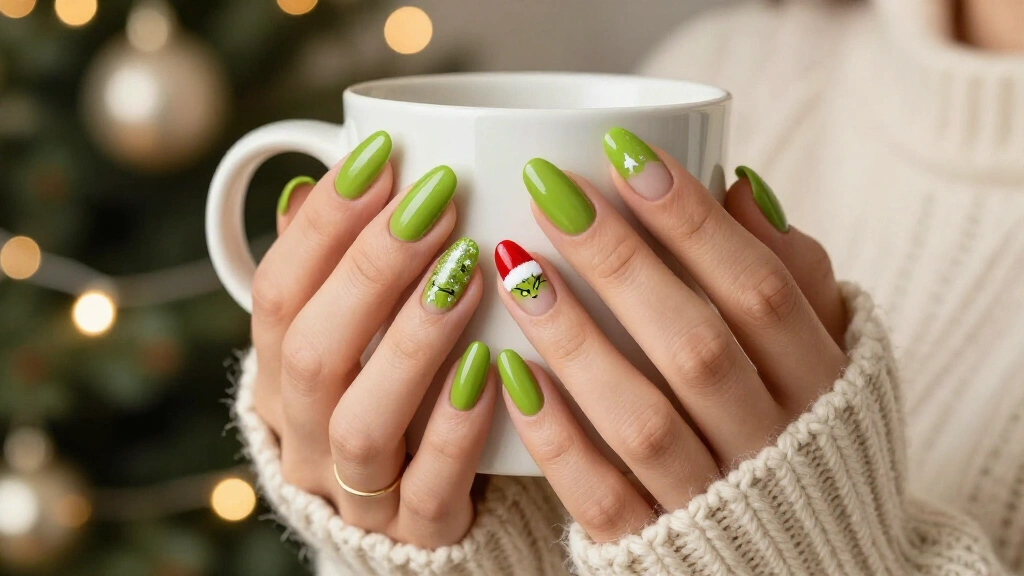
Nobody wants to spend three hours bent over a manicure table right before the holidays. Between last-minute gift shopping and back-to-back parties, your free time vanishes fast. Simple Grinch nails solve that problem. You get playful Whoville character without burning your Saturday afternoon or your wallet at the salon.
Dr. Seuss gave the world a classic holiday villain, and nail artists turned that sour green character into an easy manicure trend. You can pick a subtle French tip or wear a bright accent nail, and both options take very little time. If you want more easy holiday ideas, check out our guide on simple classy Christmas nails before your next appointment.
1. Chartreuse French Tips
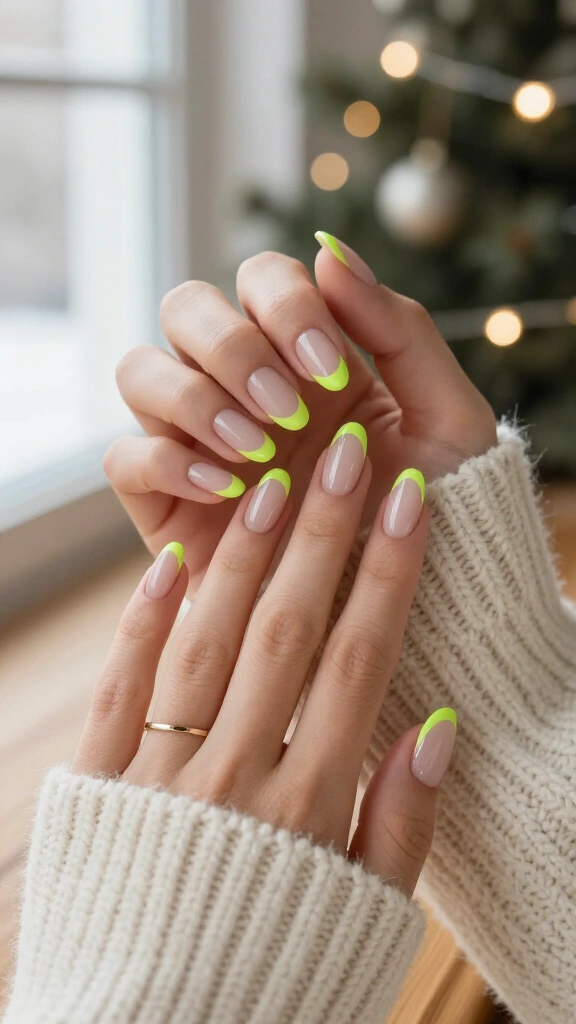
Swap your standard white French tips for a sharp, lime chartreuse. The color gives an understated nod to the character while keeping your hands clean and modern. You only need a sheer nude base and a fine liner brush to paint the smile lines.
The clean lines fit right in at work and transition easily to an evening holiday party. Paint on a durable top coat so those neon tips stay sharp through the week.
2. The Sneaky Grinch Eyes Accent
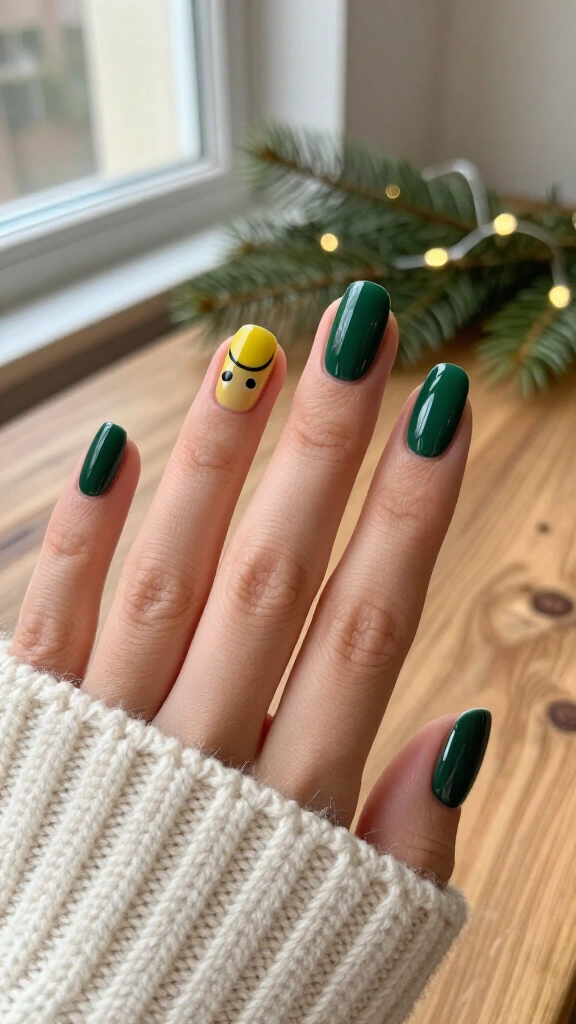
Coat four nails in a deep forest green and save your ring finger for the yellow eyes. Paint two small yellow arches and add black dots to capture his trademark scowl. The accent nail takes about two minutes and needs almost no artistic training.
Use a wooden toothpick to press the black pupils into place cleanly. Wait a minute for the dots to dry, then seal the nail with top coat so the yellow base does not smear.
3. Velvet Green Cat-Eye Nails
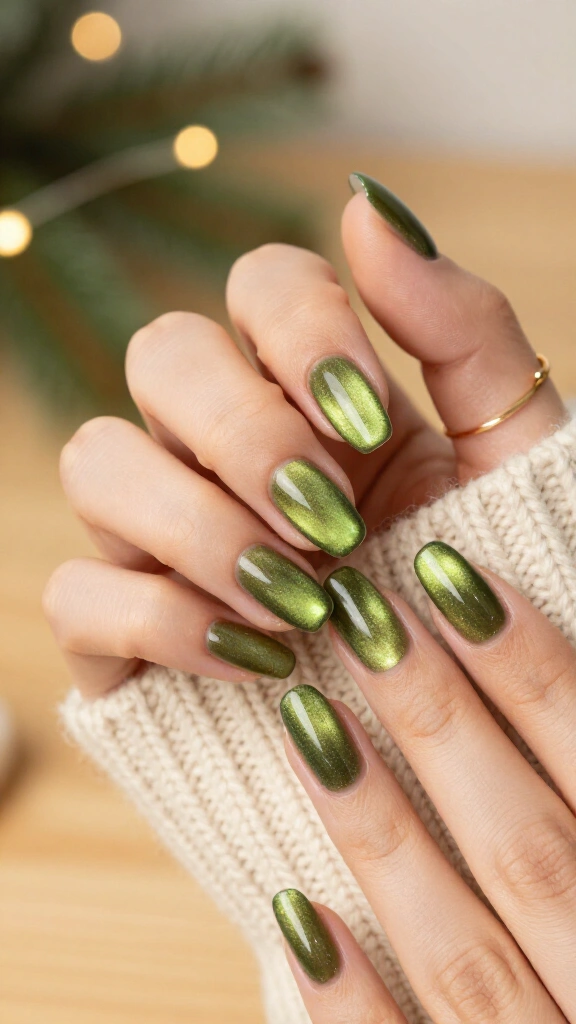
Magnetic gel polish gives you layered shimmer without any manual line work. Pick an olive or lime magnetic shade to mimic the green fur texture. When light hits the particles, the surface shifts like velvet fabric.
Guides on Allure point to magnetic finishes as one of the fastest tricks for home manicures. Hover the magnet over wet polish for five seconds, cure the gel under your lamp, and you have instant depth.
4. Two-Tone Lime and Candy Cane Accent
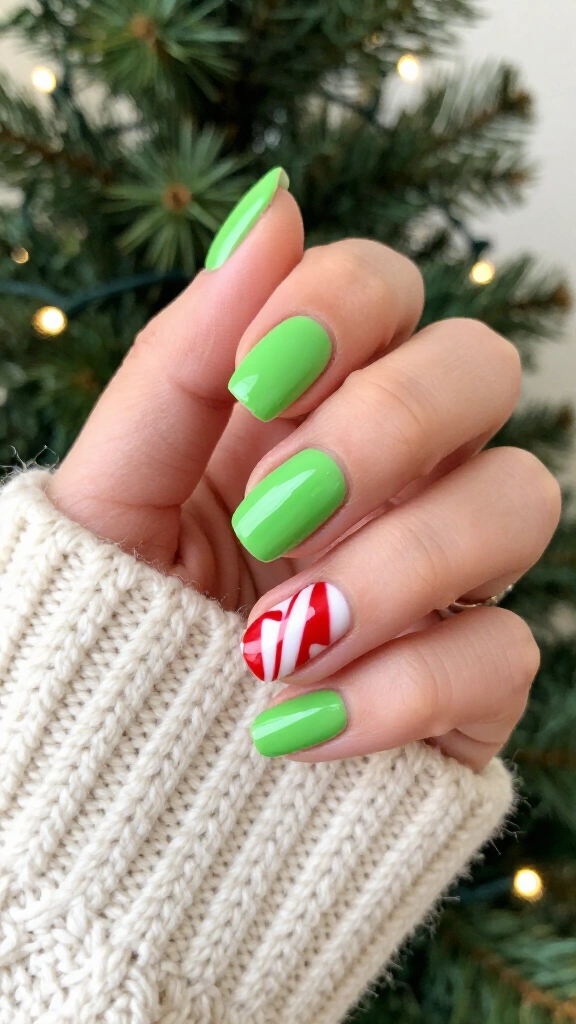
Paint four nails in lime green, then add red and white candy cane stripes across an accent finger. That bright contrast shows off Whoville holiday cheer alongside the Grinch’s sour mood. The red and white pattern stands out sharply against the acid green backdrop.
Apply thin striping tape if you struggle to paint straight lines by hand. If you want more red styles to match your winter sweaters, browse our list of December red nail designs.
5. Negative Space Whoville Heart
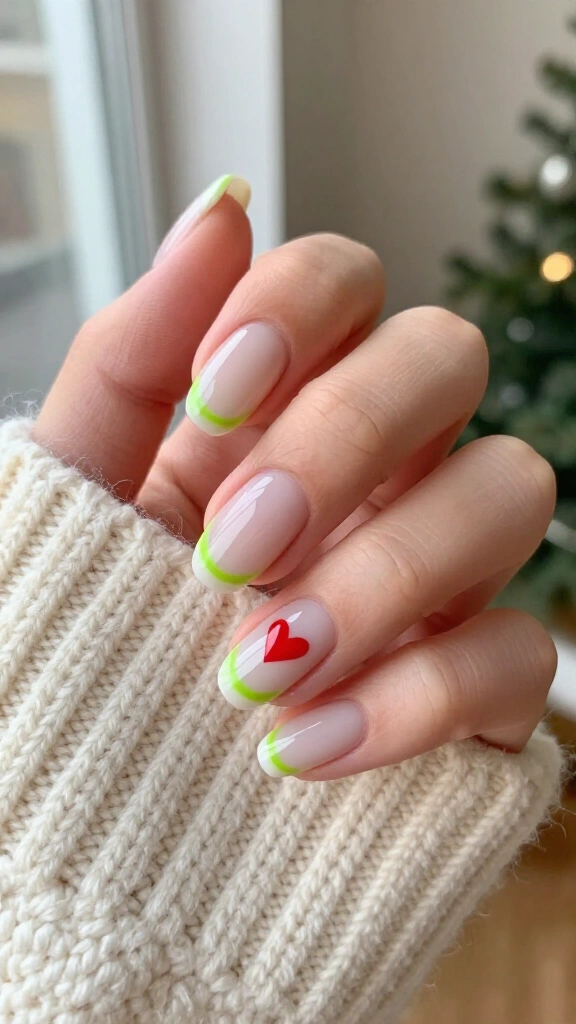
In the story, the Grinch’s small heart grows three sizes. You can recreate that moment on a sheer milky base coat with a tiny red heart centered on your middle finger. Trace a thin green line around the cuticle to tie the look together.
Bare negative space near the cuticle means the manicure grows out without obvious gaps. You get a subtle storybook reference that still looks clean and intentional.
6. Grinch Fur Glitter Drizzle
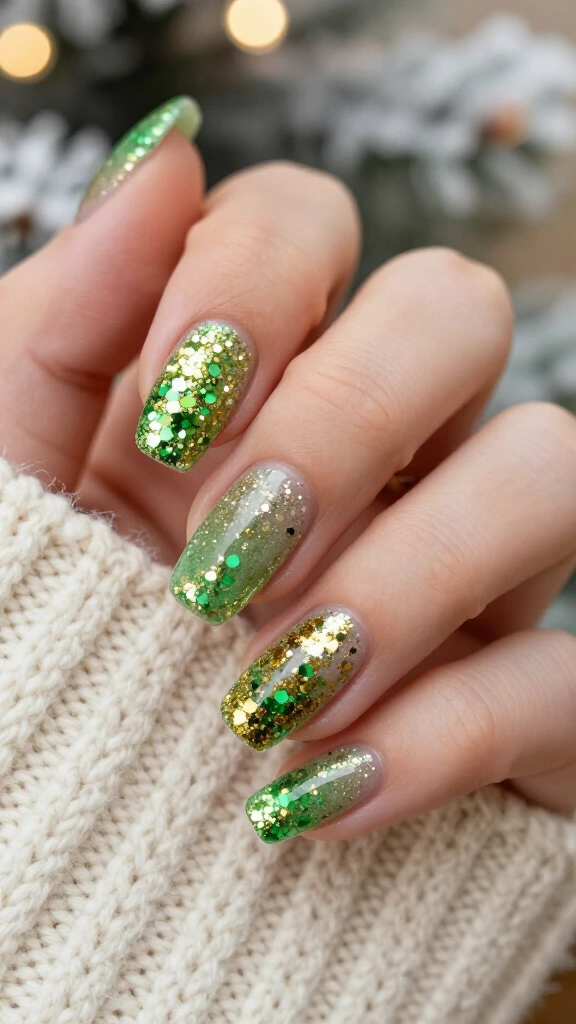
Skip fine lines and use chunky glitter polish in apple green and gold. Pack the flakes near the cuticle, then drag the brush down toward the nail tip to create an ombre fade. The scattered glitter mimics the messy texture of green fur without any tedious detail work.
Dense glitter hides streak marks in your base coat, which makes this look very forgiving. Pro tip: press the glitter onto the nail with a cosmetic sponge to lay down dense sparkle without building up thick polish layers.
7. Sour Apple Matte Finish
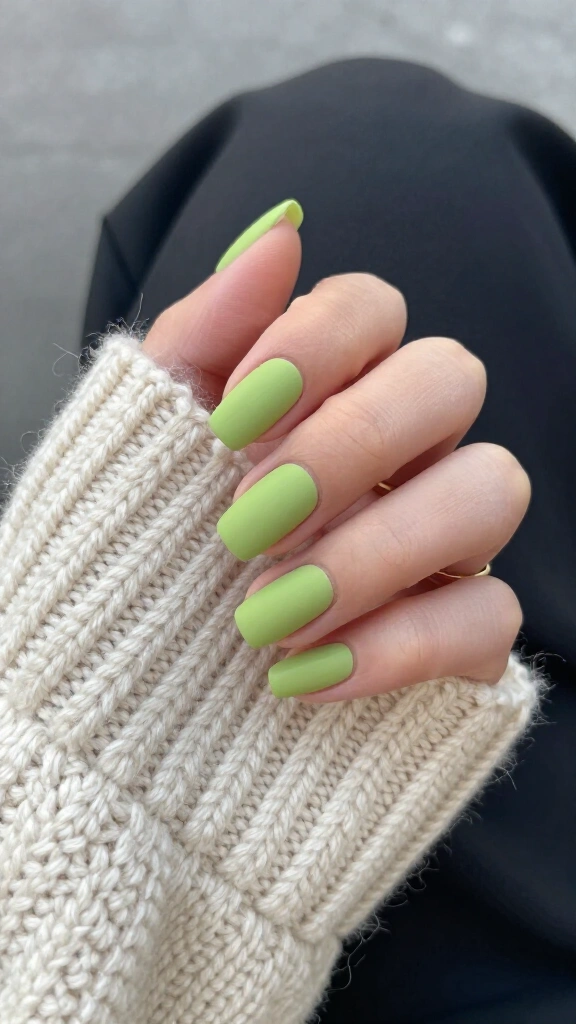
A matte top coat changes bright lime polish immediately. Flat suede textures soften loud neons into something colder and more modern. The muted finish matches heavy wool coats and oversized sweaters throughout December.
Matte coats expose dry skin quickly, so rub jojoba oil into your cuticles every morning. Nail guides on Byrdie note that regular oiling keeps matte polish from looking chalky along your skin edges.
8. Minimalist Grinch Smile Line
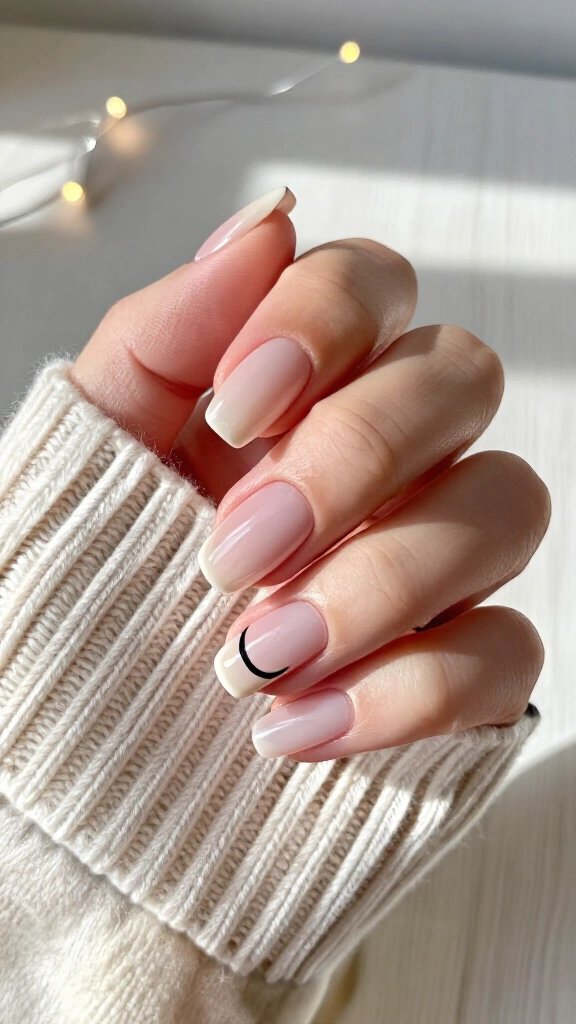
Capture the original book illustrations with a single black arc along your nail edge. Paint the line over sheer milky pink so your natural nail stays visible underneath. Flick the outer corner up into a small smirk to hint at the character.
This detail takes less than a minute once your base layer dries completely. It gives you a clever seasonal reference without drawing loud attention across a room.
9. Santa Hat On Lime Green Base
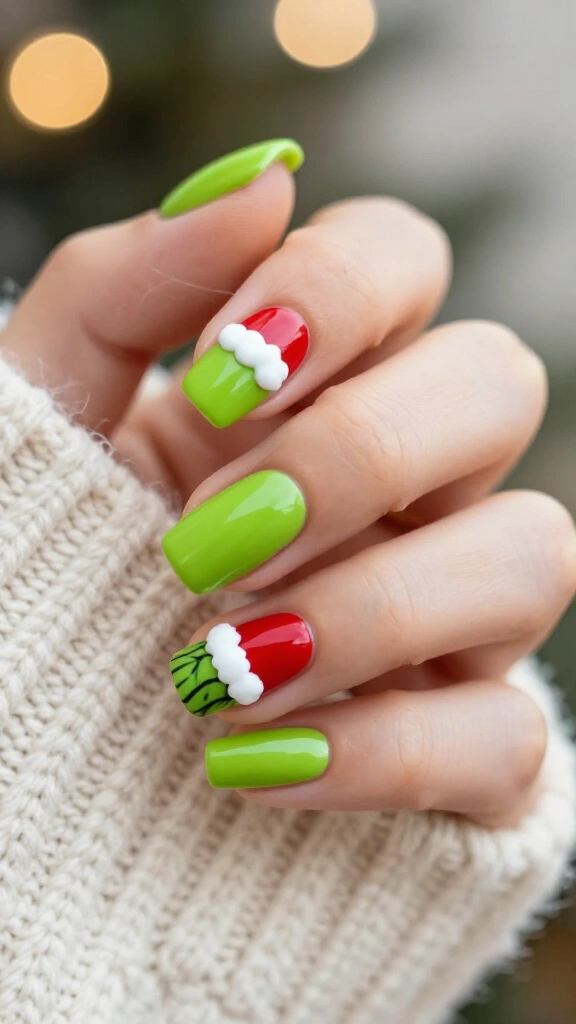
Paint your nails lime green, then brush a tiny red triangle onto your middle finger. Add a white dot at the apex to mimic the makeshift Santa cap from the story. The bright red triangle stands out sharply against the green lacquer.
Dip the round end of a bobby pin into white polish to stamp the pom-pom on top. Beginners usually pull this off on their first attempt without corrections.
10. Chrome Lime Glazed Nails
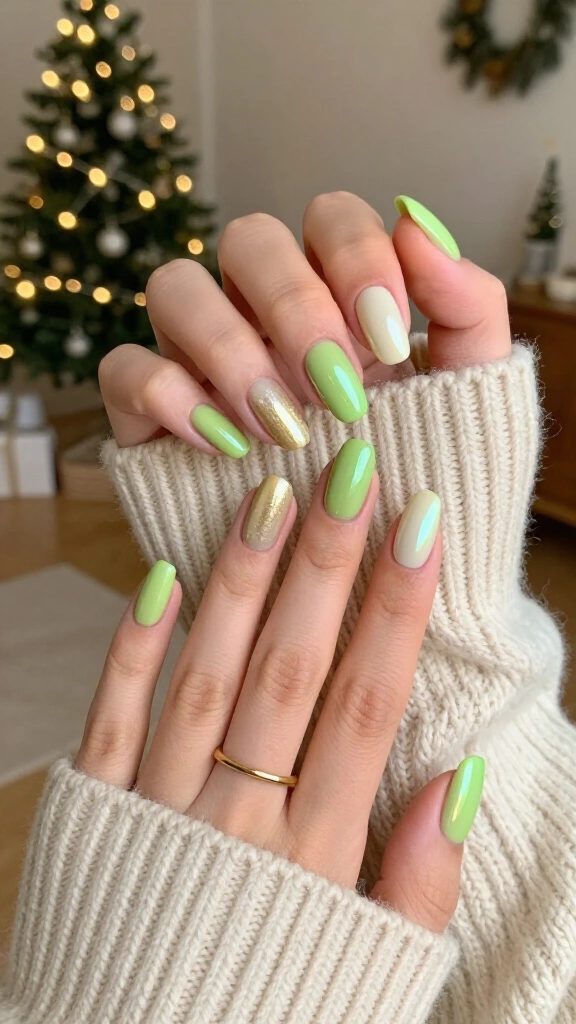
Bring a holiday spin to glazed nails with green undertones. Cure a layer of pastel lime gel, then buff pearl chrome powder over the cured polish. The chrome powder gives the pale neon a reflective, glassy sheen.
The pearlescent finish catches indoor holiday lights from every angle. You get the fun of a cartoon reference while your hands still look neat and put together.
11. Mistletoe and Grinch Green Dots
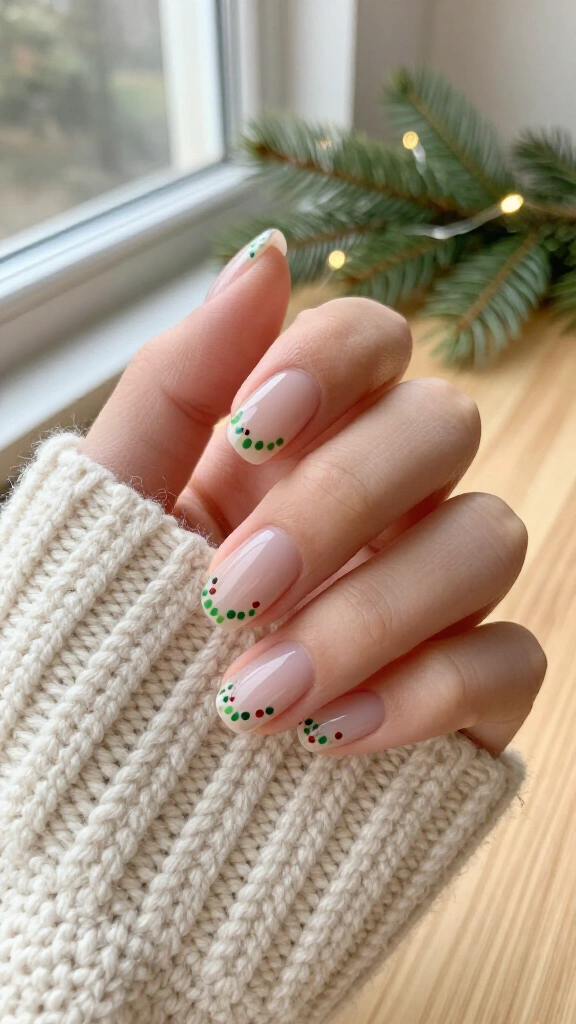
Start with a clear nude base and dot dark forest green and chartreuse polish along the cuticle line. Add two small red dots in each group to create mistletoe berries. The cluster pattern feels seasonal and subtle without covering your whole nail.
If you prefer low-key manicures with plenty of bare nail plate, explore our gallery of trendy Christmas nails for more styling ideas.
12. Olive and Chartreuse Skittle Mani
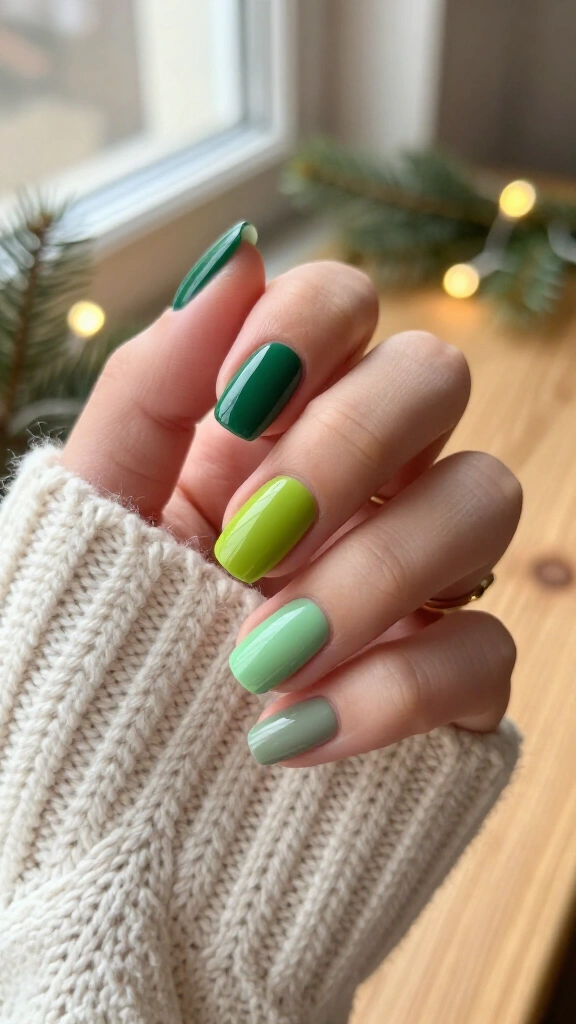
If you own multiple greens, paint each nail in a different shade from deep pine to pale sour lime. This gradient sequence looks deliberate and requires zero nail art tools or brushes.
- Thumb: Forest Pine
- Index: Kelly Green
- Middle: Grinch Chartreuse
- Ring: Wasabi Mint
- Pinky: Pale Sage
Mismatched skittle sets save serious time. Apply two coats of each shade straight from the bottle, add top coat, and you are ready to walk out the door.
13. Half-Dipped Whoville French
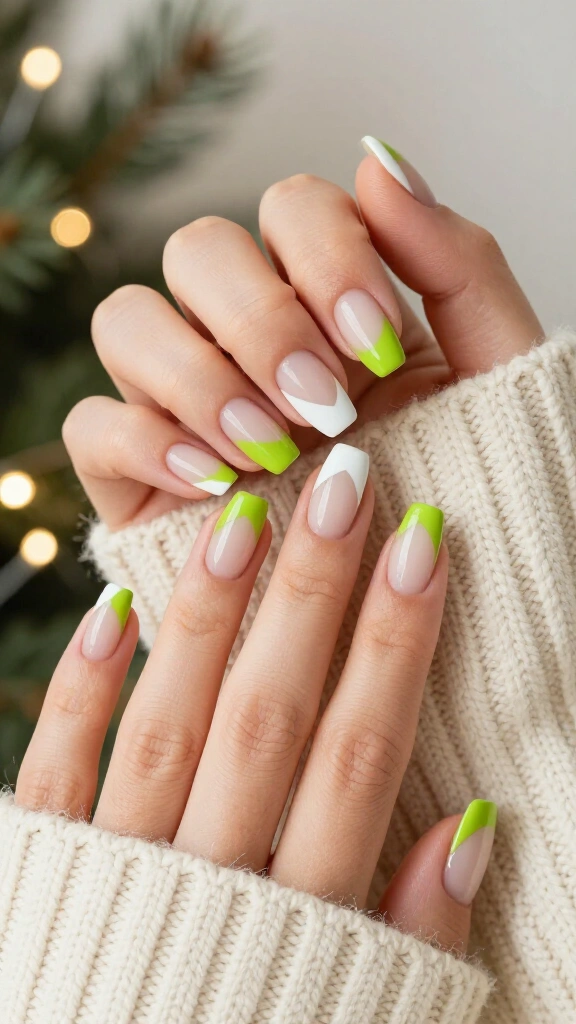
Paint your French tips diagonally across each nail tip for a modern geometric look. Brush lime green across one half of the tip and pure winter white across the other. The diagonal lines make short nail beds look longer.
Lay down masking tape across the tip if you want razor-sharp divisions between the two colors. Pull the tape up while the polish is wet so the edges do not tear.
14. Sparkly Grinch Scarf Stripes
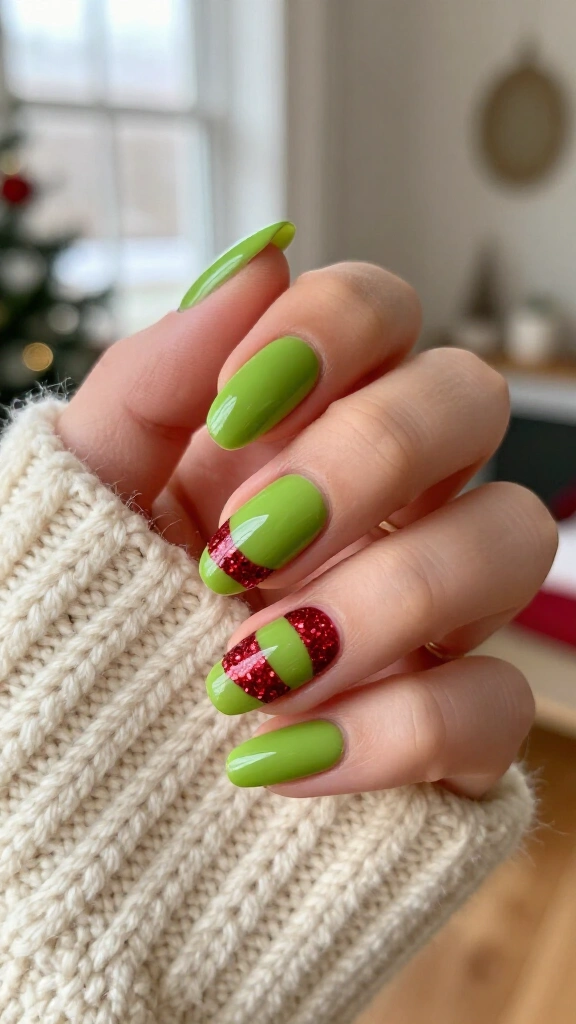
Recreate the red and white scarf from the holiday special with glitter striping polish. Coat the nail in lime green first, then paint two horizontal red glitter bands across the center. The glitter breaks up the flat background and catches the light.
The warm stripe pattern complements winter coats and thick cardigans. It adds texture to your set without cluttering the nail with tiny character portraits.
15. The “Three Sizes Too Small” Dot Grid
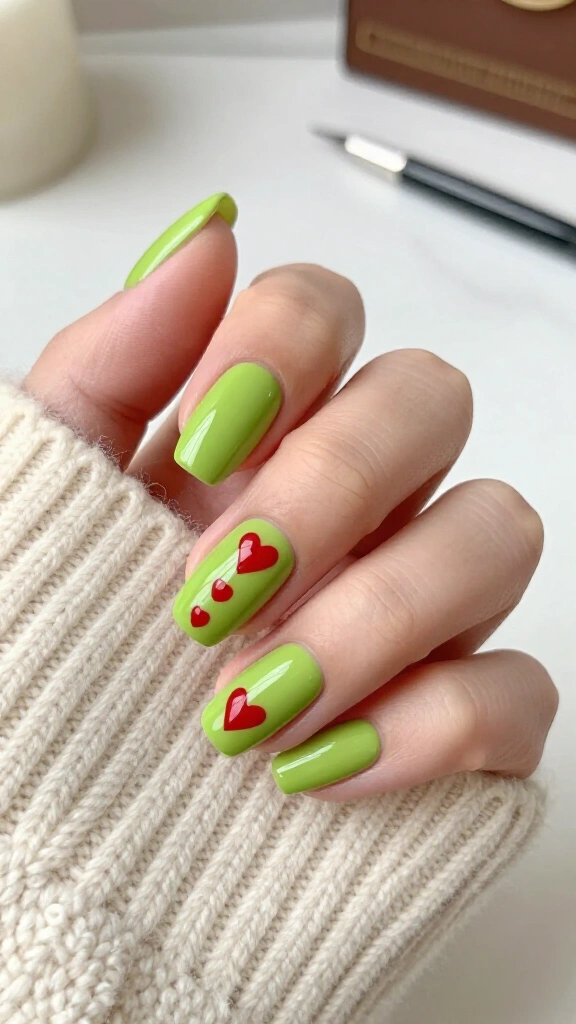
Paint three descending red dots down the center of an almond nail coated in sour green. Make the top dot wide and decrease the size toward the cuticle to represent his tiny heart. Dr. Seuss fans will catch the visual joke immediately.
A basic metal dotting tool helps you control the dot sizes without mess. The neat vertical row keeps the layout sharp and structured.
16. Golden Star on Mountain Peaks
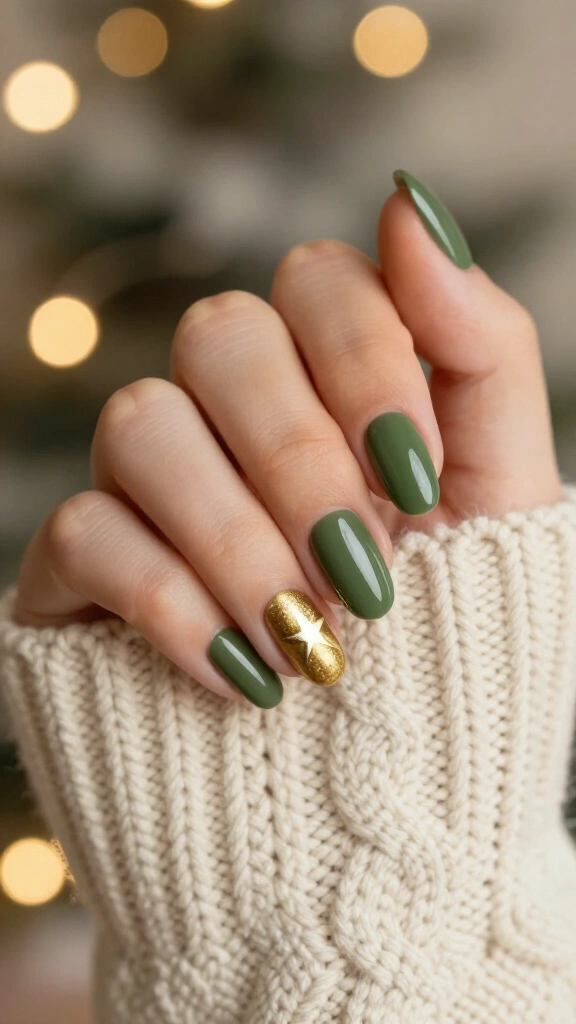
Paint your nails an olive green shade and stick a single metallic gold star decal at the tip of your ring finger. The star evokes the stolen tree topper resting on Mount Crumpit. Peel-and-stick decals skip drying time completely and eliminate messy freehand painting.
Style roundups from Harper’s Bazaar regularly recommend nail stickers when you want fast manicures at home. Brush two thin layers of top coat over the decal so the corners do not snag on your sweaters.
17. Neon Grinch Splatter Effect
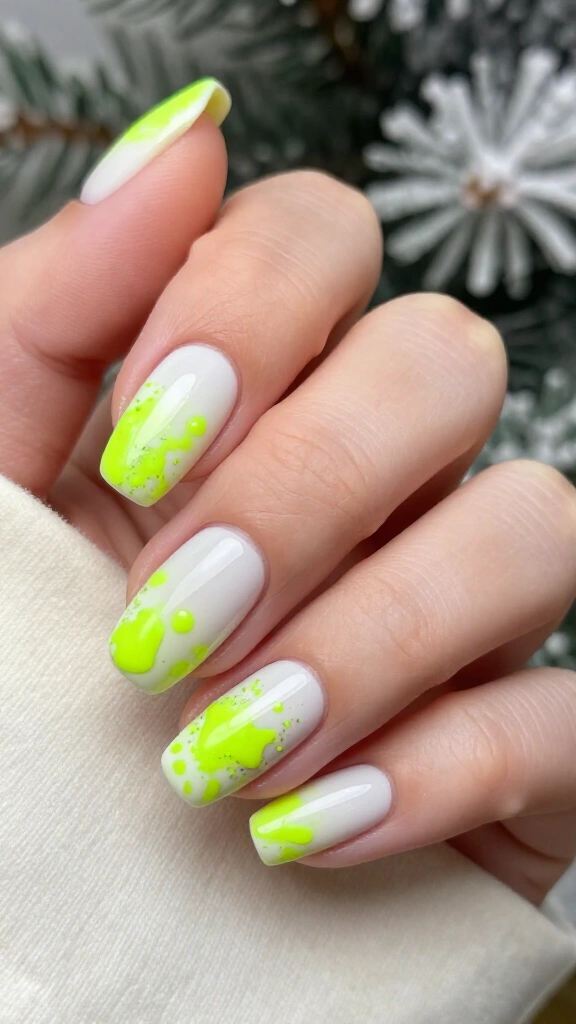
Paint a crisp white or cream base coat and let it dry. Dip an old, clean toothbrush into neon chartreuse polish and flick the bristles downward over your fingertips. The chaotic specks create an abstract pattern with very little effort.
Brush peelable liquid latex around your cuticles before you start flicking polish. Peel the tape away once you finish to leave your skin clean, then seal the nails with a clear top coat.
18. Sheer Jelly Green Glass Nails
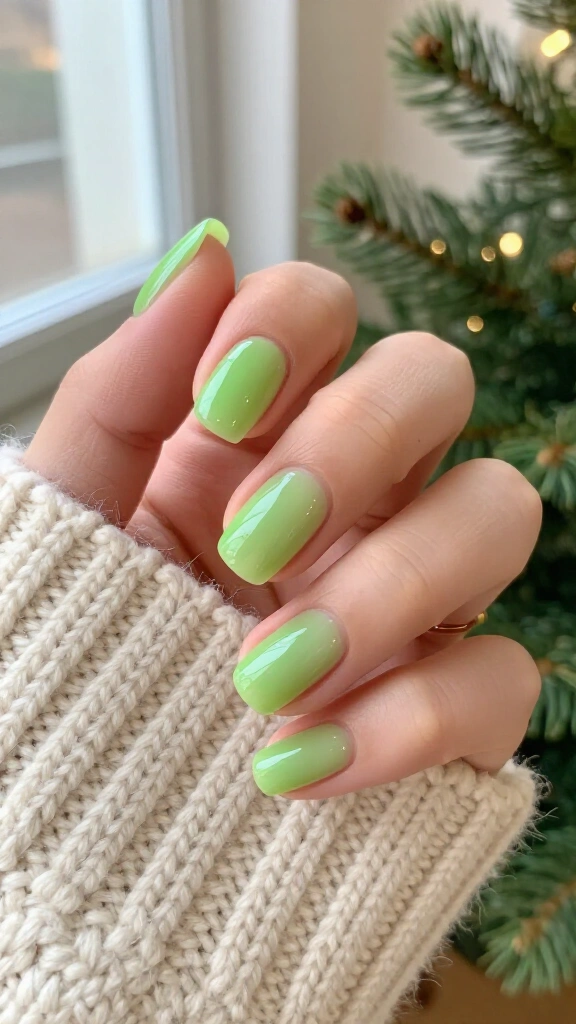
Jelly polish gives your natural nails a transparent, tinted glass appearance. Apply two light layers of sheer lime jelly polish to add color while letting the natural nail smile line show through. The result looks glossy and fresh without any fussy line work.
You need no special tools for this look, just an even stroke and a thick gloss top coat. You wear the character theme without painting faces or detailed holiday patterns.
Steal the Spotlight This Season
Holiday manicures should fit into your schedule, not drain your free time. A chartreuse French tip, a coat of magnetic velvet gel, or a quick dot design gives your nails holiday personality without hours of salon work. Grab a bottle of lime lacquer, try one of these sets, and enjoy your holiday events with great nails.
Leave a Reply
You must be logged in to post a comment.